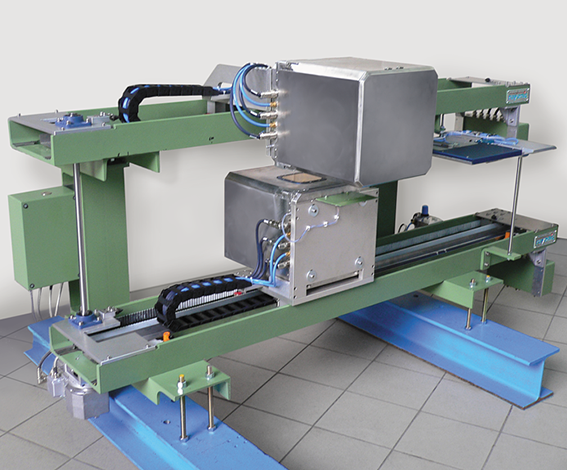
RS-40
COATING THICKNESS MEASUREMENT

Product Details
Material
Zinc
Tin
Nickel
Application
Hot-Dip Galvanizing
Hot-Dip and Electrolytic Galvanizing
Electroplating
Parameters
32 kV / 0,6 mA
25 kV / 0,8 mA
32 kV / 0,6 mA
Range
10 - 350 g/m2
0,01 - 5,0 µm
0,01 - 10,0 µm
Meas. gap
30 - 60 mm
40 mm
40 mm
Accuracy
0,10%
0,10%
0,10%
Product Description
The RS-40 X-ray Coating Thickness Gauge measures non-contact, high-precision and continuous deposition of metallic coatings on steel strip in electrolytic lines and dip coating lines.
The two backscatter heads for the upper and lower strip sides can be supplied in a common O-frame (transverse movement) or as separate systems with two individual rails. In the first case, the measurement is made against the free-running strip, while the transverse movements with individual rails allow the measurement against a return pulley.
In hot-dip galvanizing lines, the measuring system can be installed in the cold, warm and hot position. Differences only exist in the cooling and insulation of the measuring heads and the electrical components at the measuring point. For measurement in the hot position, customer-specific measuring mechanisms are delivered that are precisely matched to the respective line.
Like all Rayonic X-ray sources and detectors, the backscatter heads are housed in sturdy stainless steel housings. They consist of the X-ray source with tube, high-voltage electronics, emission control and beam shutter as well as the detector modules, which differ only in the pre-filters with regard to the different applications.
The following coatings can be measured: Zinc and zinc alloys (Zn / Ni, Zn / Al), aluminum, tin, copper and brass, nickel, cobalt, chromium, galvannealed. For the alloys, besides the total overlay, the percentage composition of e.g. Zinc and aluminum are determined for Zn / Al alloys. Further coatings on request.